
🪪 Certificate Configuration Guide
This guide explains the certificate status (cert status) displayed in the app and helps you understand what each status means, what actions you should take, and which settings to configure based on your environment.
Certificate Status Overview
Section titled “Certificate Status Overview”The app displays the connection security status for each server. Here are all possible statuses:
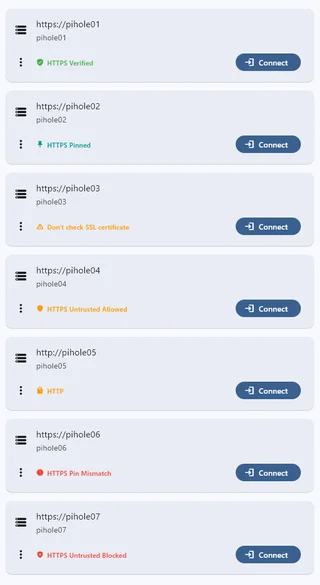
| Status | Security Level | Description |
|---|---|---|
| HTTPS Verified | Highest | Valid CA-signed certificate |
| HTTPS Pinned | High | Certificate fingerprint verified |
| Don’t check SSL certificate | Low | All certificate validation disabled |
| HTTPS Untrusted Allowed | Low | Untrusted certificates or incomplete chains accepted |
| HTTP | None | Unencrypted connection |
| HTTPS Pin Mismatch | Error | Pinned fingerprint doesn’t match |
| HTTPS Untrusted Blocked | Error | Self-signed certificate rejected |
Certificate Status Details
Section titled “Certificate Status Details”HTTPS Verified
Section titled “HTTPS Verified”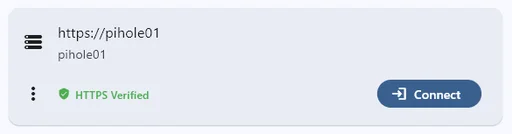
What it means:
- The server has a valid SSL certificate signed by a trusted Certificate Authority (CA)
- This is the most secure and recommended configuration
When this appears:
- Server uses a certificate from Let’s Encrypt, DigiCert, or other trusted CAs
- “Allow untrusted certificates” is OFF
User action:
- No action needed. This is the ideal state.
Recommended for:
- Production environments
- Servers accessible over the internet
- Users with reverse proxy setups using Let’s Encrypt
HTTPS Pinned
Section titled “HTTPS Pinned”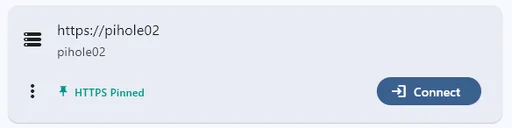
What it means:
- The app has saved (pinned) the server’s certificate fingerprint
- Each connection verifies the fingerprint matches the saved value
- Provides protection against certificate tampering or MITM attacks
When this appears:
- “Allow untrusted certificates” is ON
- You’ve connected and pinned the certificate fingerprint
User action:
- Verify the fingerprint matches your server’s actual certificate (out-of-band verification recommended)
- If you regenerate your server’s certificate, you’ll need to update the pin
Recommended for:
- Self-signed certificate users who want additional security
- Users who can verify the certificate fingerprint manually
Don’t check SSL certificate
Section titled “Don’t check SSL certificate”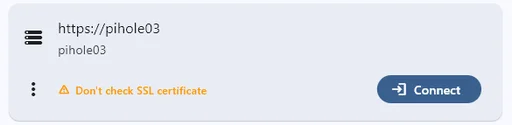
What it means:
- All SSL/TLS certificate validation is disabled
- The app accepts any certificate without verification
When this appears:
- “Don’t check SSL certificate” option is ON
User action:
- Use only on trusted local networks
- Consider setting up a proper certificate instead
Recommended for:
- Pi-hole running in Docker without proper TLS termination
- Temporary troubleshooting
- Isolated local networks with no external access
HTTPS Untrusted Allowed
Section titled “HTTPS Untrusted Allowed”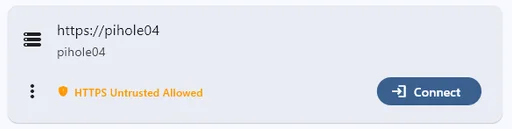
What it means:
- The server’s certificate is not trusted by this device
- The app is configured to accept untrusted certificates
- No certificate pinning is active
- Common causes: self-signed certificate, incomplete certificate chain (e.g., using
cert.peminstead offullchain.pem)
When this appears:
- Server uses a self-signed certificate or an incomplete certificate chain
- “Allow untrusted certificates” is ON
- Certificate has not been pinned yet
User action:
- For better security, pin the certificate fingerprint when prompted
- Or consider getting a CA-signed certificate
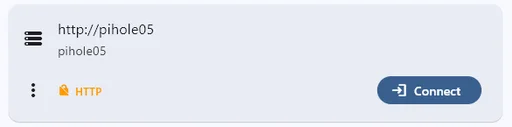
What it means:
- Connection is unencrypted
- Data is transmitted in plain text
When this appears:
- Server URL uses
http://scheme
User action:
- Consider enabling HTTPS on your Pi-hole server for better security
- Acceptable only on isolated local networks
HTTPS Pin Mismatch
Section titled “HTTPS Pin Mismatch”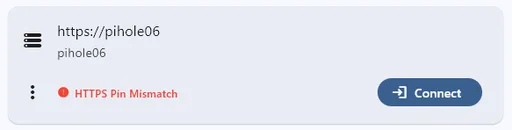
What it means:
- The server’s certificate fingerprint doesn’t match the pinned value
- Connection is blocked for security
When this appears:
- Server certificate was renewed or regenerated
- Potential MITM attack (rare but possible)
User action:
- Verify if you recently changed your server’s certificate
- If intentional change: Update the pinned fingerprint from server settings
- If unexpected: Investigate before updating the pin
HTTPS Untrusted Blocked
Section titled “HTTPS Untrusted Blocked”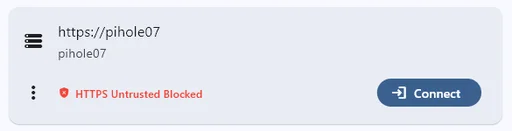
What it means:
- The server’s certificate is not trusted by this device
- “Allow untrusted certificates” is OFF
- Connection is blocked
When this appears:
- Attempting to connect to a server with a self-signed certificate or an incomplete certificate chain (e.g., using
cert.peminstead offullchain.pem) - App default settings are in effect
User action:
- Enable “Allow untrusted certificates” in server settings as a workaround
- Or fix the root cause: use a CA-signed certificate, or ensure the full chain is served (use
fullchain.pem)
Default App Settings
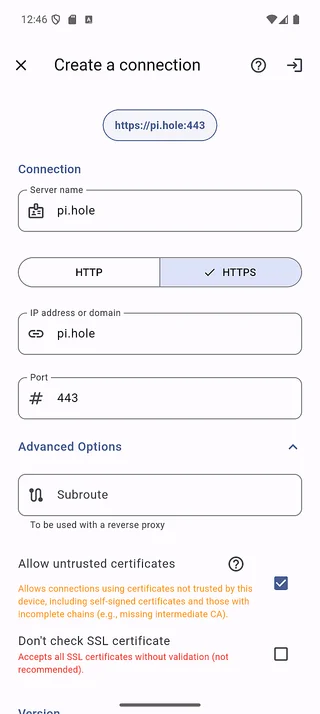
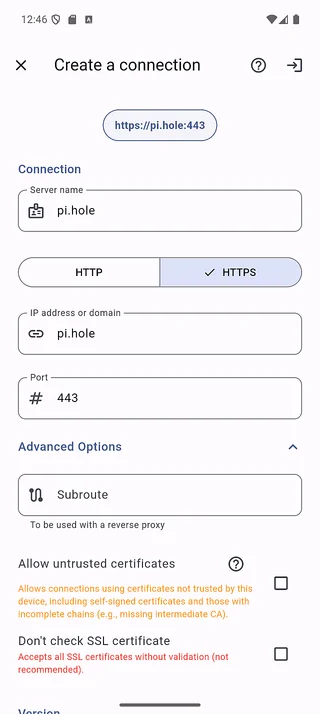
Section titled “Default App Settings”By default, the app has:
- Allow untrusted certificates: ON
- Don’t check SSL certificate: OFF
After App Update: Backward Compatibility
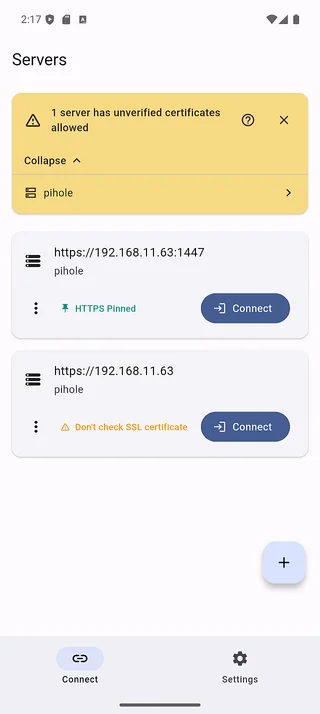
Section titled “After App Update: Backward Compatibility”If you had “Allow untrusted certificates” enabled before updating the app, the update will automatically enable both “Allow untrusted certificates” and “Don’t check SSL certificate” for backward compatibility.
As a result, all your HTTPS servers will display the “Don’t check SSL certificate” status, and a warning banner will appear:
How to Fix This
Section titled “How to Fix This”- Open the server details screen for the affected server
- Turn OFF “Don’t check SSL certificate”
- Save the settings
- The “Allow untrusted certificates” confirmation modal will appear
- Verify the certificate fingerprint and tap “Confirm”
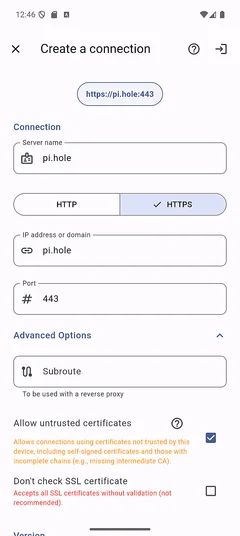
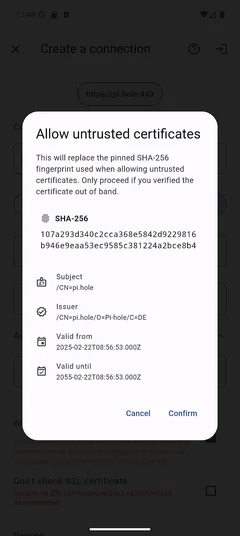
After confirming, the server will show the “HTTPS Pinned” status, which provides stronger security than “Don’t check SSL certificate”.
Pi-hole in Docker: Special Considerations
Section titled “Pi-hole in Docker: Special Considerations”If you’re running Pi-hole in Docker, you may encounter connection issues even with “Allow untrusted certificates” enabled.
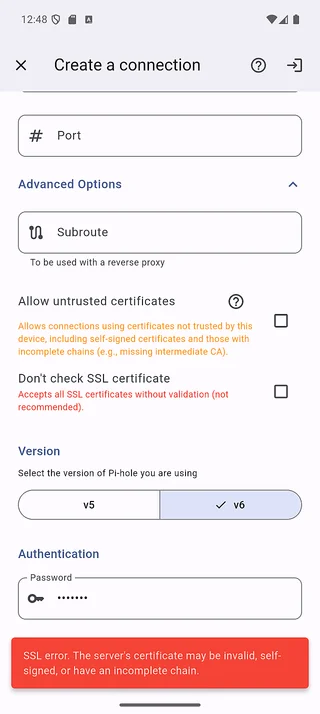
This happens because the Pi-hole Docker container’s built-in web server certificate cannot be properly validated by the app’s TLS implementation.
Solution 1: Disable Certificate Checking (Simple)
Section titled “Solution 1: Disable Certificate Checking (Simple)”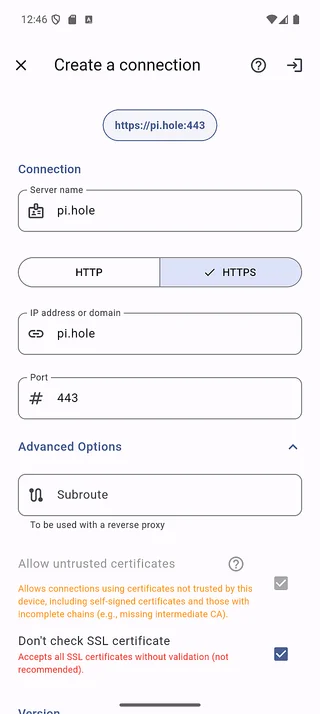
- In server settings, enable “Don’t check SSL certificate”
- Save and reconnect
Solution 2: Use a Reverse Proxy (Recommended)
Section titled “Solution 2: Use a Reverse Proxy (Recommended)”Set up a reverse proxy (nginx, Caddy, Traefik, etc.) in front of Pi-hole:
- Configure the reverse proxy to handle TLS termination
- Use either a free, valid certificate from Let’s Encrypt or a self-signed certificate on the reverse proxy.
- Connect to Pi-hole through the reverse proxy URL
Benefits:
- Achieve “HTTPS Verified” or “HTTPS Pinned” status
- Proper certificate management
- Better security overall
Example with Caddy:
pihole.local { reverse_proxy pihole:80 tls internal}Recommended Configuration by Use Case
Section titled “Recommended Configuration by Use Case”| Use Case | Recommended Setting | Expected Status |
|---|---|---|
Valid CA certificate with full chain (Let’s Encrypt + fullchain.pem) |
Allow untrusted certificates: OFF | HTTPS Verified |
Let’s Encrypt with incomplete chain (cert.pem) |
Fix server to use fullchain.pem - or enable Allow untrusted certificates: ON as a workaround |
HTTPS Verified / HTTPS Pinned |
| Self-signed certificate | Allow untrusted certificates: ON, Pin the cert | HTTPS Pinned |
| Docker without reverse proxy | Don’t check SSL certificate: ON | Don’t check SSL |
| Local HTTP only | - | HTTP |
SSL Error with a Valid Let’s Encrypt Certificate (Incomplete Chain)
Section titled “SSL Error with a Valid Let’s Encrypt Certificate (Incomplete Chain)”If you’re using a valid Let’s Encrypt certificate but still get SSL errors in the app, the most common cause is an incomplete certificate chain.
Unlike web browsers, which can automatically fetch missing intermediate certificates,
Flutter’s HTTP client requires the server to provide the complete chain.
This typically happens when the server is configured with cert.pem instead of fullchain.pem.
Symptoms:
- SSL error when connecting through the app
- The connection works fine in a web browser
- The certificate appears valid when viewed in a browser
Solution 1: Fix the certificate chain (Recommended)
Section titled “Solution 1: Fix the certificate chain (Recommended)”Pi-hole requires a single combined PEM file containing both the certificate and the private key.
The key point is to use fullchain.pem (not cert.pem) when creating this file.
Pi-hole v6 (pihole.toml or environment variable):
Create the combined PEM with the full chain:
cat /etc/letsencrypt/live/yourdomain.com/fullchain.pem \ /etc/letsencrypt/live/yourdomain.com/privkey.pem \ > /etc/pihole/tls.pemThen set the path in pihole.toml:
[webserver.tls]cert = "/etc/pihole/tls.pem"After updating, restart Pi-hole and reconnect - the status should change to HTTPS Verified.
Solution 2: Enable “Allow untrusted certificates” (Workaround)
Section titled “Solution 2: Enable “Allow untrusted certificates” (Workaround)”If you cannot fix the server configuration immediately:
- Open server settings and expand Advanced Options
- Enable “Allow untrusted certificates”
- Pin the certificate fingerprint when prompted
Troubleshooting
Section titled “Troubleshooting”Having issues with certificate configuration? Check out the FAQ for common questions and solutions: